The article explains how to create an API test project in Katalon Studio and how to write the test cases in the Groovy script. The test is done on the basis of Free fake API for testing and prototyping (see link).
About Katalon Studio
Katalon Studio is an all-in-one test automation solution. It enables automated testing of Web, API, mobile, and desktop (Windows) applications. It is sufficient for beginners to have some low-code experience, and the experts have an infinite testing extension.
To learn how to install Katalon Studio, visit the link.
You can prepare the test cases in the manual view as well as in a script view for users with programming skills to write test cases. The tool is based on Groovy/Java for editing test scripts in this view.
Create an object repository for testing
Firstly, to prepare for API testing, you must create a project in Katalon Studio. Beginners have the option to create a project using the templates.
Launch Katalon Studio and select the menu item File > New Sample Project > Sample API Tests Project. After that, the dialog window invites you to enter information:

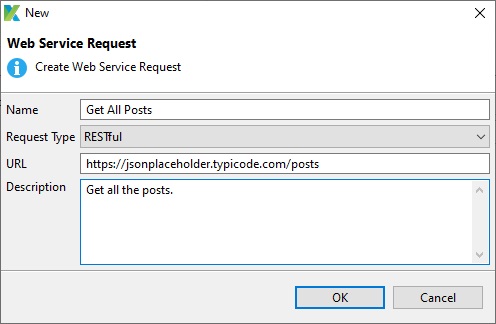
Select Object Repository in the Tests Explorer tool, right-click on it and select the menu item New > Web Service Request from the context menu. Then, the dialog window invites you to fill it in:
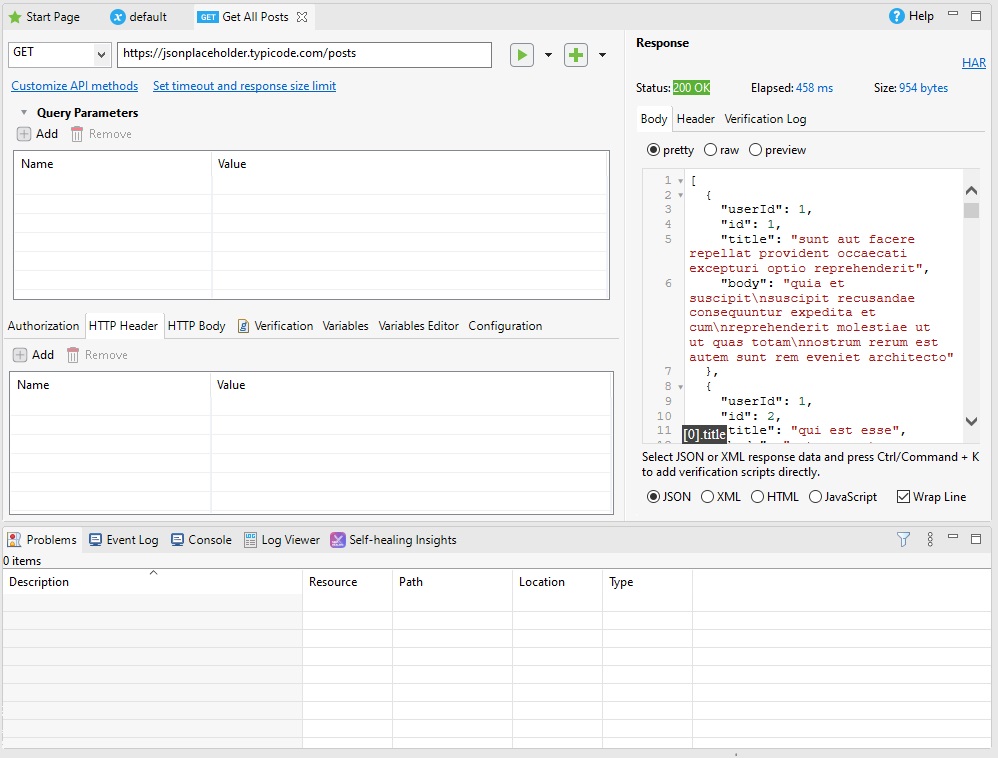
Double click on the created object and click on the little green triangular button to launch the web request. Finally, you expect to see this result:
You can examine the completed project at the GitHub repository. The project also contains other web-request objects:
- Get Post by ID
- Create New Post
- Get Post Comments by postId (path)
- Get Post Comments by postId (url)
- Search Posts by postId
- Update a Post Parameter
- Update Entire Post
- Delete Post by ID
Let us examine only one of them: Create New Post, because it differs slightly from the example above.
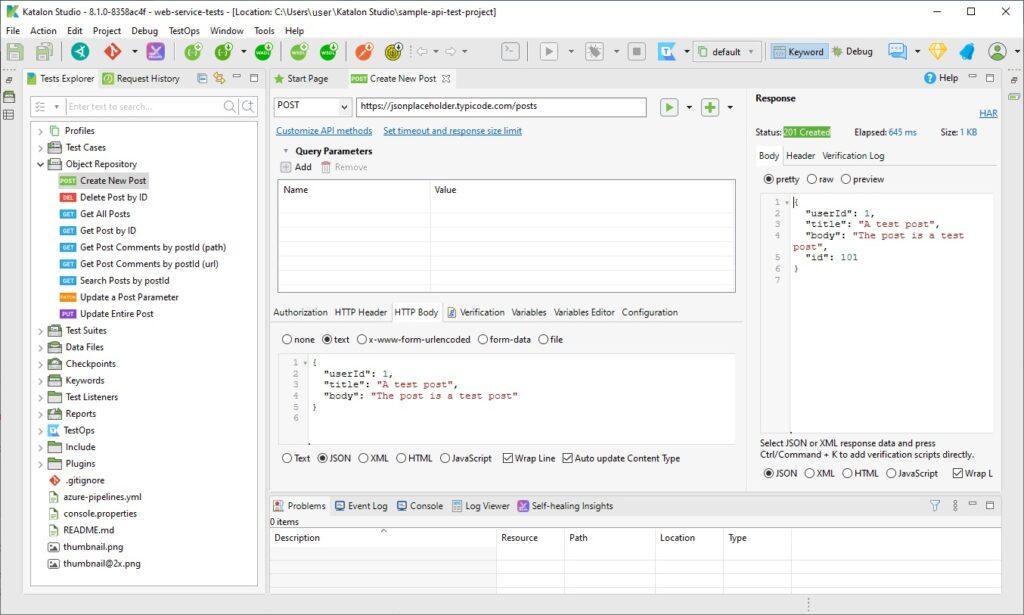
Take a note of the JSON body and method POST, because these are what distinguish this from the preceding example above.
How to Create Test Cases
You can use both views to create test cases: manual and script views. However, in this article, we use a mixed method, beginning with manual and progressing to script view.
Create Standard Test Case
Select Test Cases in the Tests Explorer tool, right-click on it and select the menu item New > Test Case from the context menu. After all, the dialog window is filled and the test case is created:
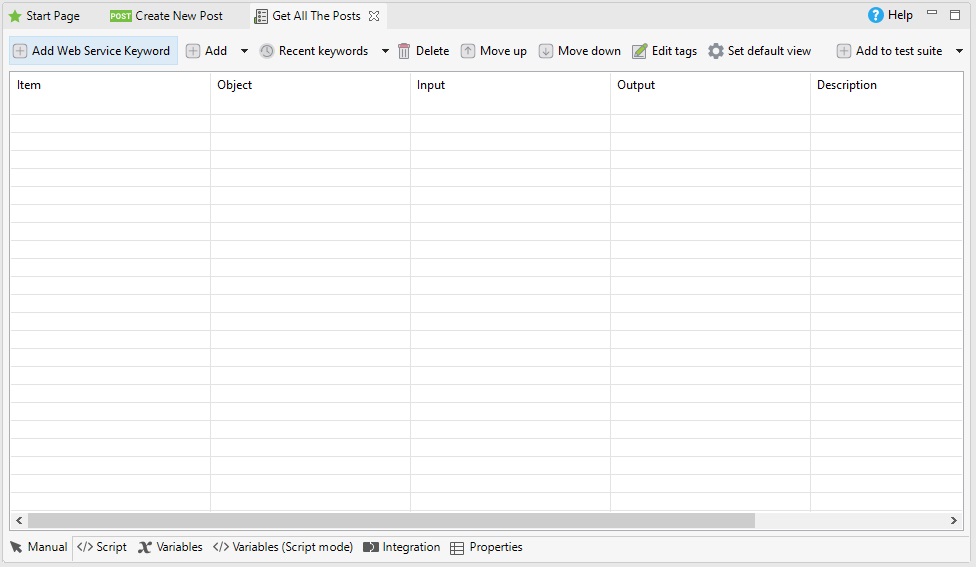
Click on the button Add Web Service Keyword. Select Send Request in the column Item. Click on the empty cell in the column Object. Finally, the dialog window invites you to select a test object:

Select the Get All Posts item.
Until now, we were in the manual view. To activate the script view, click on the tab </>Script below. Take note that the script is prepared to perform subsequent steps – nearly all libraries have been imported and a web request has been written.
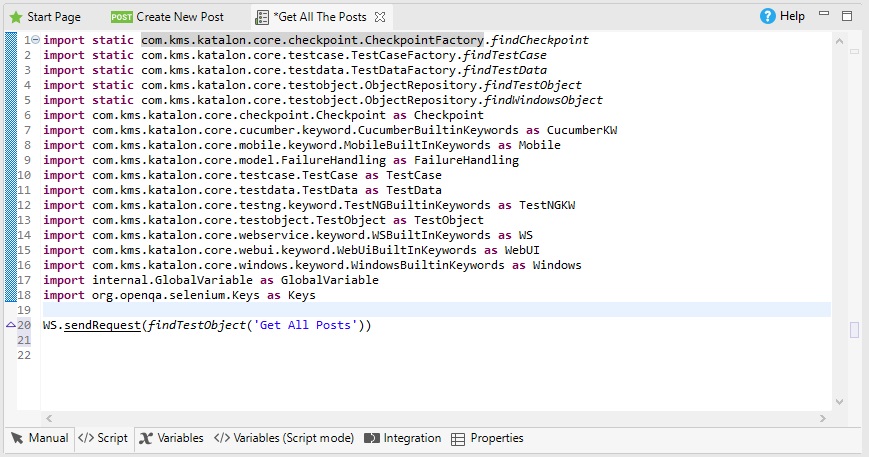
Modify the script to make complete test case:
import static com.kms.katalon.core.checkpoint.CheckpointFactory.findCheckpoint
import static com.kms.katalon.core.testcase.TestCaseFactory.findTestCase
import static com.kms.katalon.core.testdata.TestDataFactory.findTestData
import static com.kms.katalon.core.testobject.ObjectRepository.findTestObject
import static com.kms.katalon.core.testobject.ObjectRepository.findWindowsObject
import com.kms.katalon.core.checkpoint.Checkpoint as Checkpoint
import com.kms.katalon.core.cucumber.keyword.CucumberBuiltinKeywords as CucumberKW
import com.kms.katalon.core.mobile.keyword.MobileBuiltInKeywords as Mobile
import com.kms.katalon.core.model.FailureHandling as FailureHandling
import com.kms.katalon.core.testcase.TestCase as TestCase
import com.kms.katalon.core.testdata.TestData as TestData
import com.kms.katalon.core.testng.keyword.TestNGBuiltinKeywords as TestNGKW
import com.kms.katalon.core.testobject.TestObject as TestObject
import com.kms.katalon.core.webservice.keyword.WSBuiltInKeywords as WS
import com.kms.katalon.core.webui.keyword.WebUiBuiltInKeywords as WebUI
import com.kms.katalon.core.windows.keyword.WindowsBuiltinKeywords as Windows
import internal.GlobalVariable as GlobalVariable
import org.openqa.selenium.Keys as Keys

import groovy.json.JsonSlurper as JsonSlurper

def jsonSlurper = new JsonSlurper()

'Get all the posts'
allPostsResponse = WS.sendRequest(findTestObject('Get All Posts'))

WS.verifyResponseStatusCode(allPostsResponse, 200)

List allPosts = jsonSlurper.parseText(allPostsResponse.responseText)
totalPosts = allPosts.size()

assert ('The posts total is not 100') && totalPosts==100

printf("Total posts: %d \n", totalPosts)
To launch the test and view the results, click the green triangular button:

All tests were completed successfully. Therefore, the green checkboxes in the Log Viewer window indicate this.
Take note that we use two different validation commands: verify and assert. Shortly, their distinction is as follows:
- Using the assert command causes the cancelation of that particular test method’s execution, and the test method is marked as failed because the validation failed.
- In the case of verify, the test method continues to execute, even if an assertion statement fails. While the test method will remain unsuccessful, the remaining statements will be executed normally.
Create Complex Test Case
The section describes how to create a complex test case, which includes the creation of custom keywords and validating response data by class type.
Select Keywords in the Tests Explorer tool, right-click on it and select the menu item New > Package from the context menu. Name the package as postsPackage and click on the OK button to create it.
Select postsPackage and right-click on it. In the context menu click on the menu item New > Keyword. Fill the fields as follow:
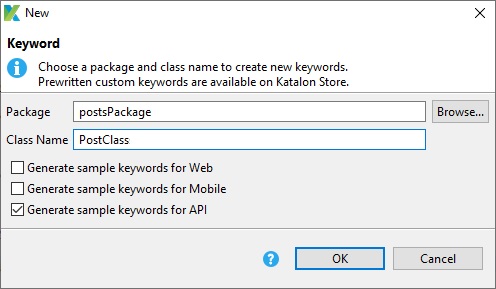
The class created. Specify in it the parameters of the post object:
package postsPackage
// The import statements are omitted here.

class PostClass {

	Integer userId
	Integer id
	String title
	String body
}
Create the test case as it was described in the preceding section and select the test object Get Post by ID. Then switch to the Script view and write in it:
// The import statements are omitted here.

def jsonSlurper = new JsonSlurper()

'Get Post by ID request'
def postResponse = WS.sendRequest(findTestObject('Get Post by ID', [('id') : '1']))

WS.verifyResponseStatusCode(postResponse, 200)

def postObject = jsonSlurper.parseText(postResponse.responseText)

assert 'The postObject is null' && postObject!=null

def post = postObject as PostClass

postClassName=post.getClass().getName()

assert 'the value postClassName is not type of postsPackage.PostClass' && postClassName=='postsPackage.PostClass'

assert ('The post ID is not 1') && post.id==1

printf("Post class name: %s \n", postClassName)

printf("Post ID: %d \n", post.id)
Take note that the result type is verified by the pre-defined class type.
Launch the test. Finally, you expect to see this result:
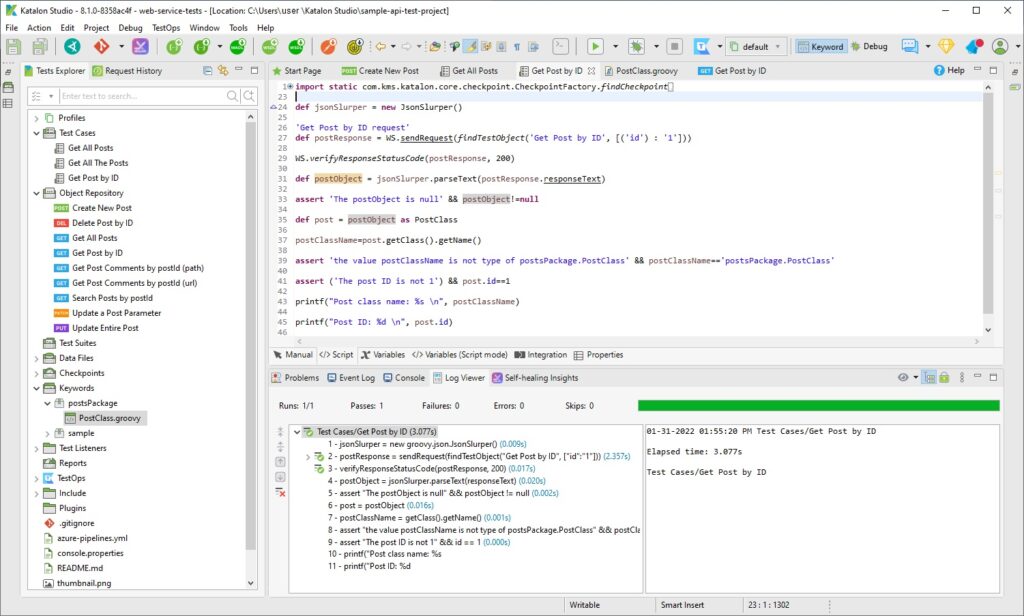
In the same way create the test cases for the test test objects:
- Create New Post
- Delete Post by ID
- Get Post Comments by postId (path)
- Get Post Comments by postId (url)
- Search Posts by postId
- Update a Post Parameter
- Update Entire Post
You can find these test cases in the completed project at the GitHub repository.
Create a Test Suit
The final step of the project is to create a test suit that will allow you to run a collection of either multiple different or duplicate test cases.
Select Test Suites in the Tests Explorer tool, right-click on it and select the menu item New > Test Suite from the context menu. After that, name the test suite as Posts Test Suite and click on the OK button to create it.
The test suite is created. Thereafter, to add test cases to the new test suite, click the button Add. Finally, the dialog window invites you to select the test cases:
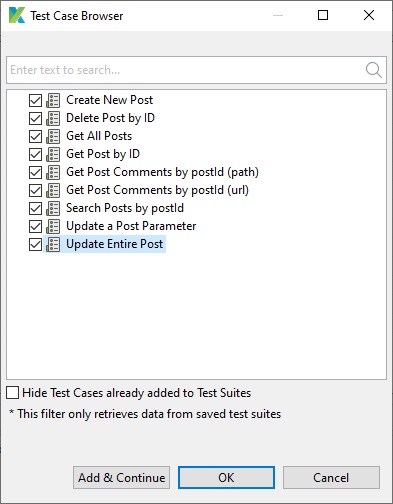
Click on the button OK and a test suite is created.
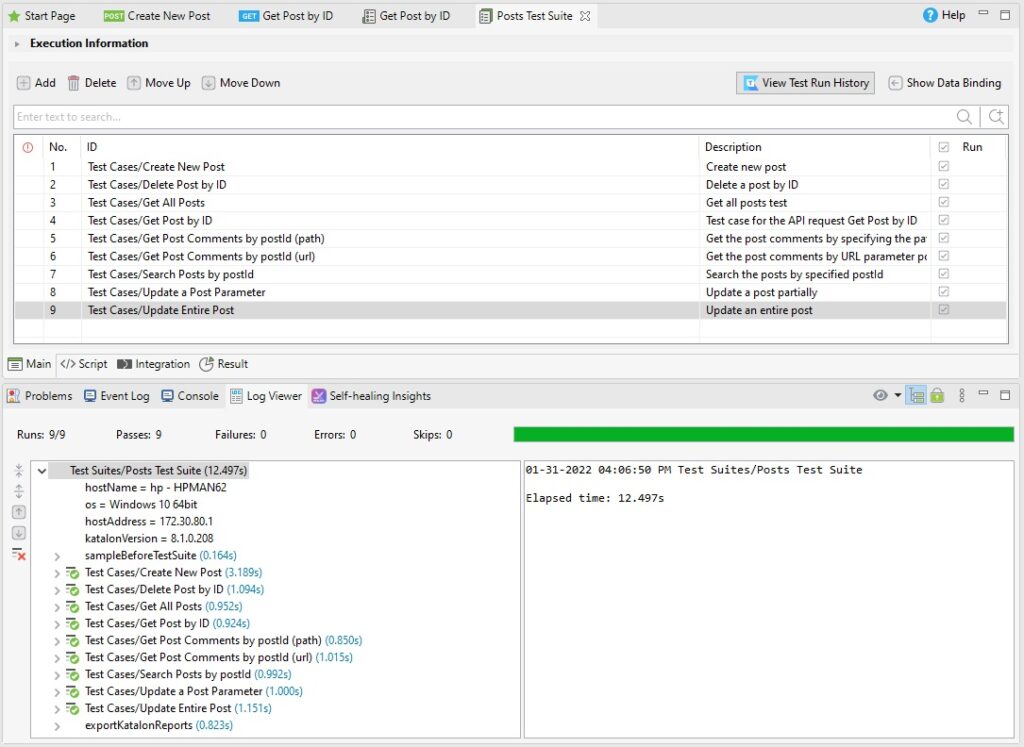
To launch the test suite, click on the green triangular button, and hence you can examine the test results:
Was this helpful?
3 / 0
[…] Katalon Studio allows expert users to programmatically write automation tests in the Groovy Script view of test cases. To learn how to create a Katalion Studio test project, follow the link. […]