The article shows how to create an Apps Script project in your Google account.
About Google Apps Script
Google Apps Script is a Google-developed cloud-based JavaScript platform for developing lightweight applications on the Google Workspace platform.
With Apps Script you can:
- Integrate with and automate tasks across Google products.
- Create a lightweight website with a rich user interface and data-presenting features that consumes data from G Suite applications (e.g., Google Sheets).
- Make functions in Apps Script and call them just like built-in functions from your Google spreadsheet.
- Create Add-ons and share your solution with others on the Google Workspace Marketplace.
- Make Chat bots which let users interact with services as if they were a person.
In particular, in this article, we are going to demonstrate how to create a web application from a Google Sheet.
Note: you can find the project files at this location.
How to Create Web Application Using Apps Script
We assume that you have a Google account. If not, create it.
In this section, we demonstrate how to create an example project for depot bus registration. For this purpose, we will do the following:
Create Sheets for the Project
Click on the button with the Google Apps icon![]() and then on the button with the Sheets icon
and then on the button with the Sheets icon ![]() . After that, name the sheet “Depot Bus Registration” (write it in the top-right field, placed next to the sheet icon).
. After that, name the sheet “Depot Bus Registration” (write it in the top-right field, placed next to the sheet icon).
Then create the following sheets:
The sheet “buses”
The sheet “buses” contains the fields:
- Ord: table data ID.
- Status: bus status (route, completed, depot, absent).
- Route: bus route number
- Exit: bus exit number for the route.
- Bus: bus license plate.
- Driver: bus driver
- Distance: bus total distance by odometer at the registration moment.
- Out: when a bus exits from a depot
- In: when a bus enters a depot.
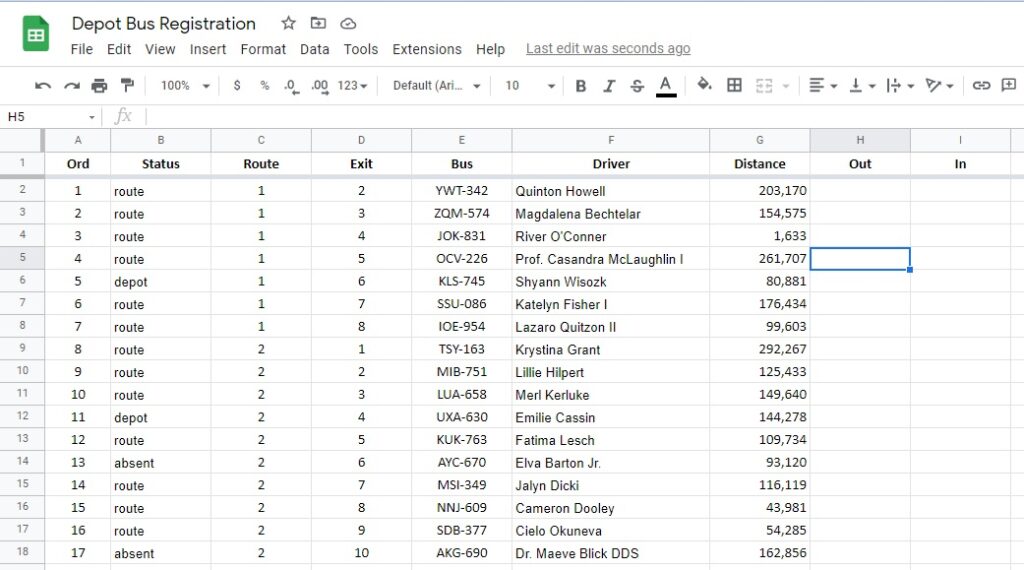
Note: The drivers and bus license plates are randomly generated.
We store bus registration data in the sheet “buses“.
The sheet “absense_type”
The sheet “absence_type” contains the bus absence types from the route:
| Display | Value |
|---|---|
| Accident | accident |
| Braking system | braking system |
| Cash register | cash register |
| Clutch | clutch |
| Compressor | Compressor |
| Cooling system | cooling system |
| Door | door |
| Due to driver | driver |
| Electric system | Electric system |
| Engine | engine |
| Front axle | front axle |
| Fuel tank | fuel tank |
| General | general |
| Generator | generator |
| Headlights | headlights |
| Painting | painting |
| Power unit | power unit |
| Rear axle | rear axle |
| Salon lighting | Salon lighting |
| Starter | starter |
| Steering wheel | steering wheel |
| Tech-service 1 | ts1 |
| Tech-service 1 | ts2 |
| Tire | tire |
The sheet “absence”
The sheet contains fields:
- Id: table data ID
- Depot: a depot where a bus belongs
- Bus Model: bus model
- License Plate: bus license plate
- Absence Type: bus absence type (not on route)
- Status: status of the information (“current”, “out dated”, “closed”)
- Date Range: bus absence date range
Comment – comment
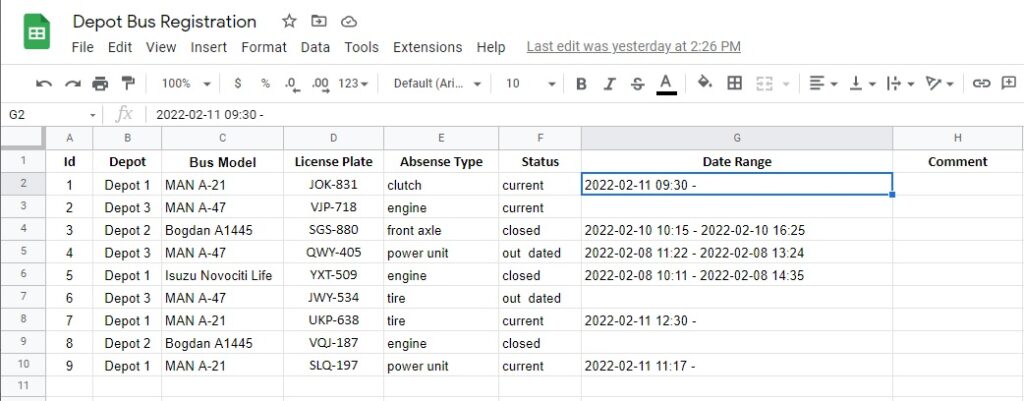
Name the data range (all data except of header) in the sheet “buses” as “busesDataRange” and the data range in the sheet “absence” as “absenceRange“. Afterward, we will use them in the project code.
Other Project Sheets
The project also contains the sheets:
- “statuses“, with the content:
| Display | Value |
| Planned | planned |
| Current | current |
| Completed | Completed |
| Outdated | outdated |
- “depots“, with the content:
| id | name |
| Depot 1 | Depot 1 |
| Depot 2 | Depot 2 |
| Depot 3 | Depot 3 |
- “bus_models“, with the content:
| Display | Value |
| BMC Procity | BMC Procity |
| BOVA | BOVA |
| Isuzu Novociti Life | Isuzu Novociti Life |
| MAN A-21 | MAN A-21 |
| MAN A-47 | MAN A-47 |
| Bogdan A092,A093 | Bogdan A092,A093 |
| Bogdan A1445 | Bogdan A1445 |
Create a Web Application
Now it’s time to create a web application that will consume the newly created Google Sheets. For the sake of doing it, click the menu item Extensions > Apps Script :

You can expect to see the opened Google Apps Script project:
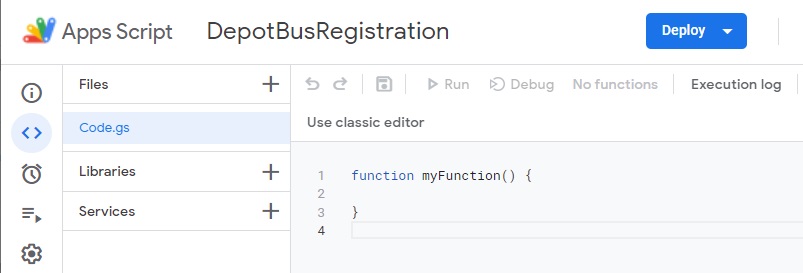
Rename the project to “DepotBusRegistration” and write in the Code.gs file the following code:
function doGet() {

  return HtmlService
      .createTemplateFromFile('index')
      .evaluate();
}

function readRange() {
  return readSheetValues('buses!busesDataRange');
}

function readAbsenses() {
  return readSheetValues('absence!absenceRange');
}

function readBusModels() {
  return readSheetValues('bus_models!busModelsRange');
}

function readAbsenseTypes() {
  return readSheetValues('absence_type!absenceTypesRange');
}

function readStatuses() {
  return readSheetValues('statuses!statusesRange');
}

function readDepots() {
  return readSheetValues('depots!depotRange');
}

function readSheetValues(rangeName) {
    var spreadsheetId = '1rA0o29xwr-dchXCL5uoMz8hewRlcBjZ7ooIjI0s3djc';

  var readValues = Sheets.Spreadsheets.Values.get(spreadsheetId, rangeName).values;

  if (!readValues) {
    Logger.log('No value data found in the range %s.', rangeName);
  }

  return readValues;
}Note: we assigned our existing sheet ID value to the variable spreadsheetId. Google generates this ID and assigns it to the sheet as well as you will create sheet. Put you own sheet ID instead it, which you can find it in the browser’s (with opened sheet) address field .
You also need some other files for the project. Follow the link to find an appropriate project, or click the links below:
- index.html, The file works exactly the same way as a usual index.html file in a web application, but you can also use Google Script (GS) code blocks together with JavaScript code blocks. The GS code blocks are enclosed with the
<?and?>tags. - stylesheet.html is a usual stylesheet file but with an unusual file extension. It’s because of the Apps Script project features.
- javascript.html is also a usual JavaScript file but with an unusual file extension for the abovementioned reason..
And finally, you have all the required files:
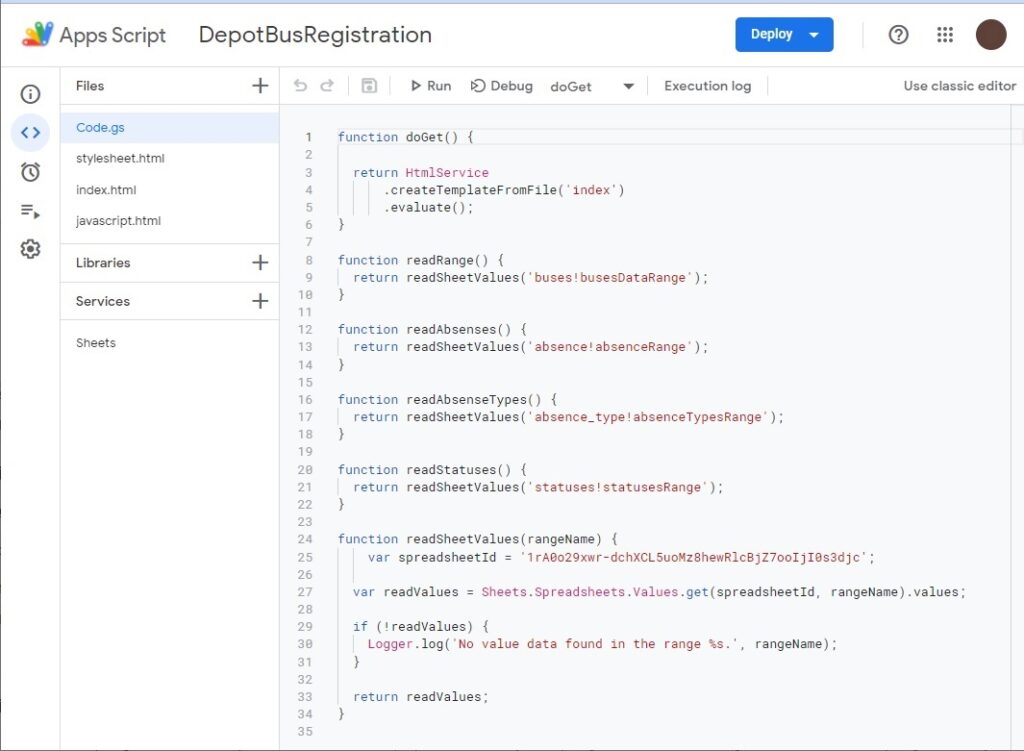
Take note of the item “Sheets” below the filename list. It is not a file, it is a service that you should add in order to be able to launch the project. Add it by clicking on the plus icon next to the menu item “Services” and following the tips.
Deploy Web Application
Now everything is ready to deploy the application.
I hope you noticed the dropdown button “Deploy” on the above demonstrated image. Click it to start deploying process.
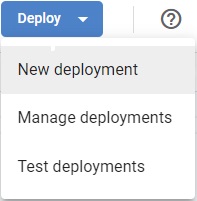
After that, click the button “New deployment” and make all the necessary settings as shown in the image below:
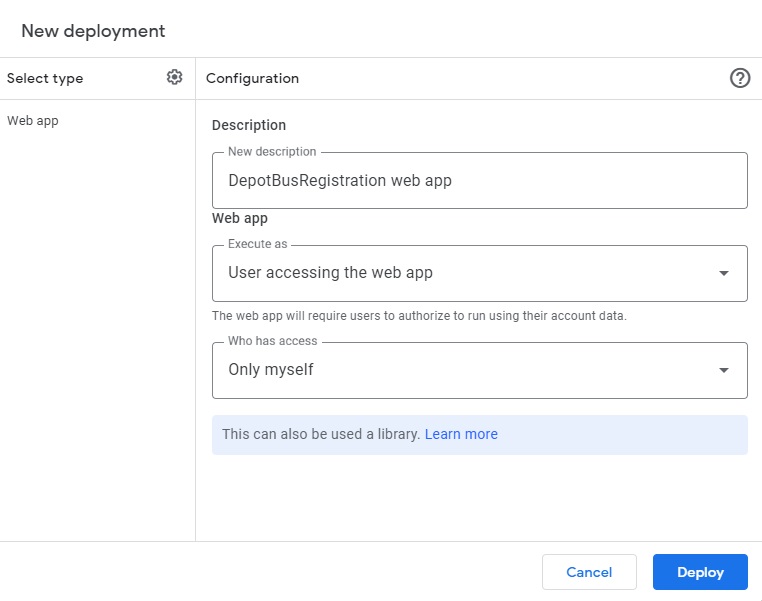
Click on the button “Deploy” and, finally, you will see the window with the web application URL. Click on it (or copy it) and you should expect to see your web application, particularly the Bus Register interface:
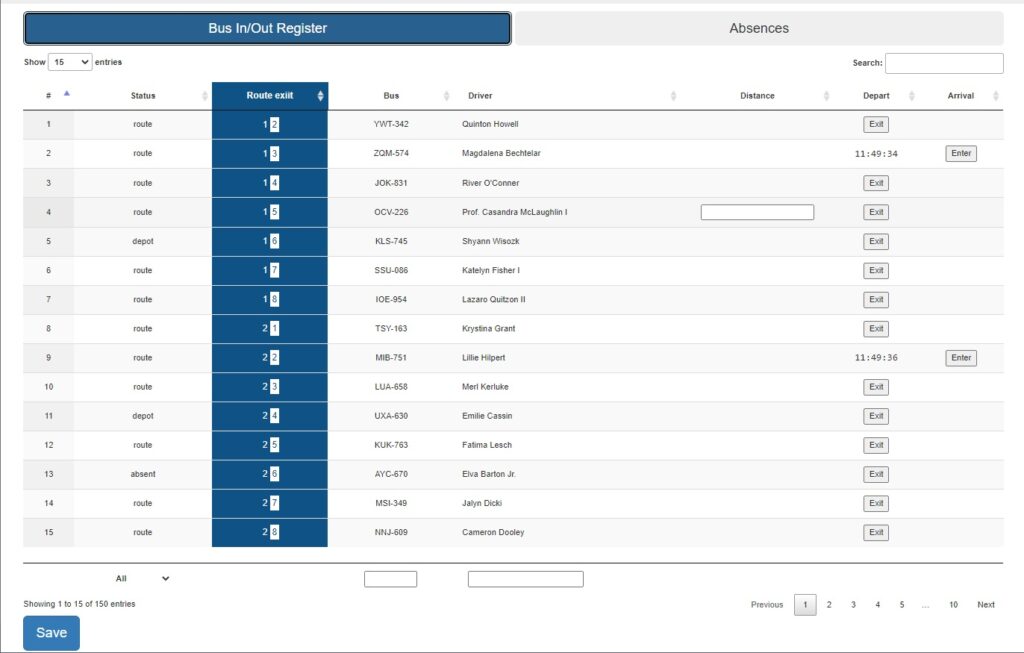
Then you can click on the tab “Absences” and see the Bus Absences interface:
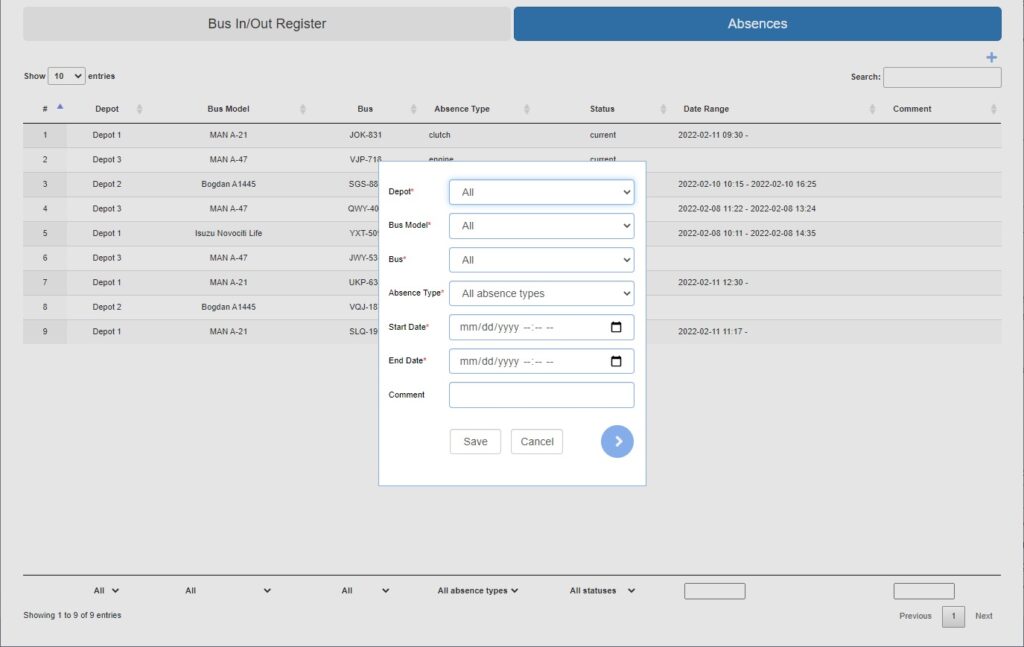
Congratulate ! You have first workable web application done in the Google App Script.
Note: use the button “Test deployments” if you are modifying your project and want to see result before updated deployment.
Was this helpful?
2 / 0
[…] G Suite allows you to create custom functions, including financial functions. You can create custom functions using App Script. To learn how to create and use App Script, follow the link. […]