The article demonstrates how to create a .NET Core application in Visual Studio Code. In addition, you can find examples here for both console and web application development.
Make a folder with a project name (e.g., vsc-dotnet-core).
Carry out preliminary installations:
- Visual Studio Code (see the link to find how to install it)
- .NET Core SDK
Note: after version .NET Core 2.2 running of the commanddotnet new consoleautomatically installs the appropriate SDK version. - C# extension
- NuGet extension
Create a .NET Core Console Application
Create a Console Project
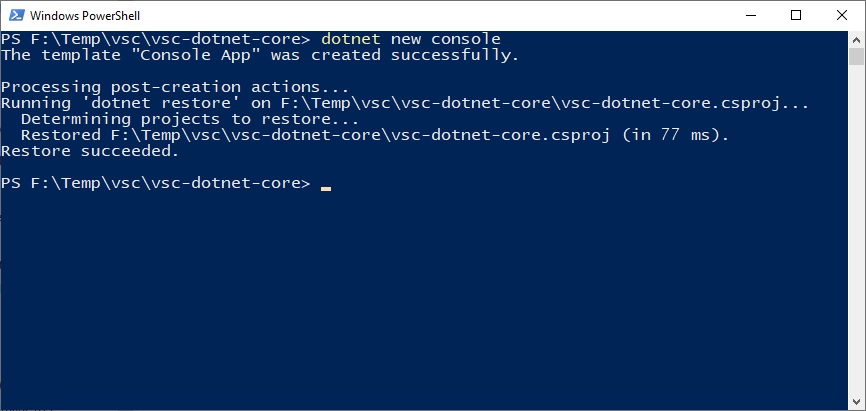
Navigate to the project root folder and run the command:
dotnet new console
You can find the “Hello World” console project in the root folder:

Launch Visual Studio Code and open the project folder and then start the project by executing the following command:
dotnet runCreate a Launch File
For more complex projects, a user must create the files:
tasks.json: is used to run various supplementary codes, such as source code analyzers, bundlers, the SASS compiler, and so on.launch.json: to launch an application for the purpose of debugging.
Click on the menu item Run > Add Configuration...
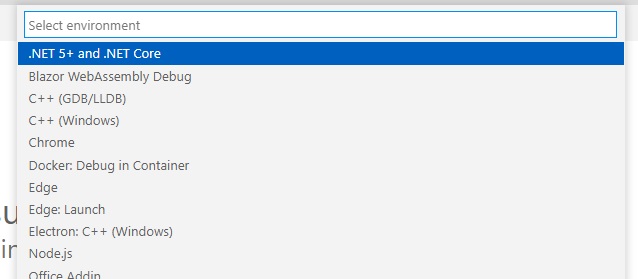
Find at the top-center of the application window the environment selector:

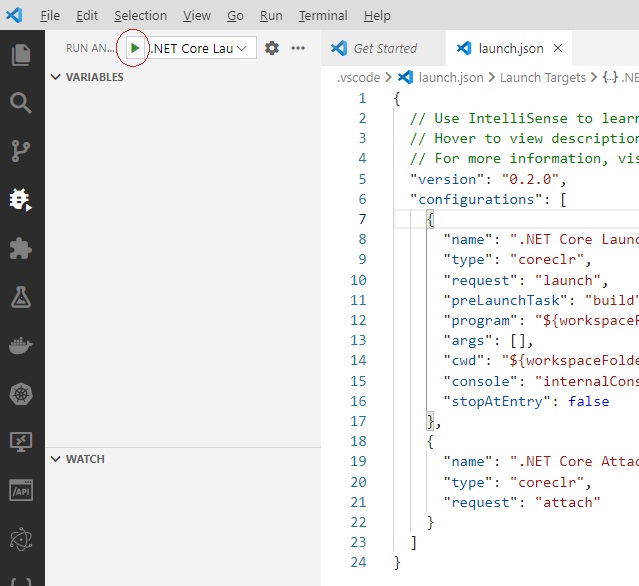
Select .NET 5+ and .NET Core and click on them, and as a result, the launch.json file is created:
{
  // Use IntelliSense to learn about possible attributes.
  // Hover to view descriptions of existing attributes.
  // For more information, visit: https://go.microsoft.com/fwlink/?linkid=830387
  "version": "0.2.0",
  "configurations": [
    {
      "name": ".NET Core Launch (console)",
      "type": "coreclr",
      "request": "launch",
      "preLaunchTask": "build",
      "program": "${workspaceFolder}/bin/Debug/net6.0/vsc-dotnet-core.dll",
      "args": [],
      "cwd": "${workspaceFolder}",
      "console": "internalConsole",
      "stopAtEntry": false
    },
    {
      "name": ".NET Core Attach",
      "type": "coreclr",
      "request": "attach"
    }
  ]
}
To start the project, click on the key F5 or on the tiny green button:

Create a.NET Core ASP.NET Application
So far, we’ve shown you how to make a console project with Visual Studio Code in the previous part.
You can also create an ASP.NET Core application:
- Make a new directory on your local disk (suppose
aspnet-core). - Open the created directory in Visual Studio Code by selecting
File -> Open Folder. - Open the terminal by selecting
Terminal -> New Terminal. - Execute the following command:
yo aspnetIf you have not installed the yeoman-generator aspnet, consequently, you will get a failure response:
Error aspnet

You don't seem to have a generator with the name “aspnet” installed.
But help is on the way:

You can see available generators via npm search yeoman-generator or via http://yeoman.io/generators/.
Install them with npm install generator-aspnet.

To see all your installed generators run yo without any arguments. Adding the --help option will also show subgenerators.

If yo cannot find the generator, run yo doctor to troubleshoot your system.
Check installed yeoman-generators by starting the command:
npm search yeoman-generatorInstall the aspnet generator by executing the following command:
npm install generator-aspnetAfter you’ve finished installing the aspnet generator, run the command yo aspnet once more. You will get something along the lines of:
     _-----_     ╭──────────────────────────╮
    |       |    │      Welcome to the      │
    |--(o)--|    │  marvellous ASP.NET Core │
   `---------´   │        generator!        │
    ( _´U`_ )    ╰──────────────────────────╯
    /___A___\   /
     |  ~  |
   __'.___.'__
 ´   `  |° ´ Y `

? What type of application do you want to create? (Use arrow keys)
> Empty Web Application
  Empty Web Application (F#)
  Console Application
  Console Application (F#)
  Web Application
  Web Application Basic [without Membership and Authorization]
  Web Application Basic [without Membership and Authorization] (F#)
(Move up and down to reveal more choices)
Select the web application option.
Then it asks which UI framework to use in the project. Select the Bootstrap option.
Then you will be asked for an application name; enter AspNetWebApplication.
After a while, the project is created and you will get a success response with the next steps’ recommendations:
Your project is now created, you can use the following commands to get going
    cd "AspNetWebApplication"
    dotnet restore
    dotnet build (optional, build will also happen when it's run)
    dotnet ef database update (to create the SQLite database for the project)
    dotnet run
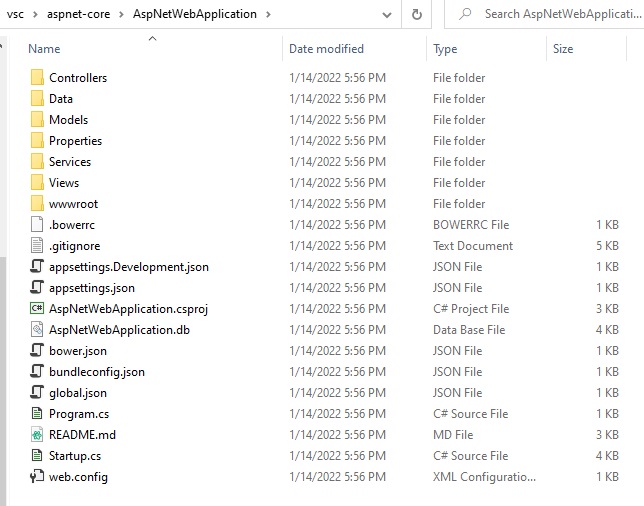
Examine the project folder for any newly created content.

Was this helpful?
1 / 0
[…] Create a console-type project in Visual Studio Core. For further information, see the link. […]
[…] Create a console-type project in Visual Studio Core. For further information, see the link. […]